Place microphone in exam delivery room
The microphone must be located near the center of the room so it can capture the sound from all the workstations in the exam delivery room.
|
The range for the microphone is 300-400 square feet. If your exam delivery room is larger than 300-400 square feet, you must install a second microphone. |
- Plan where you will place the microphone in the exam delivery room. See Plan camera and microphone locations topic.
- String the audio cable from the DVR in the admissions area to the center of the exam delivery room.
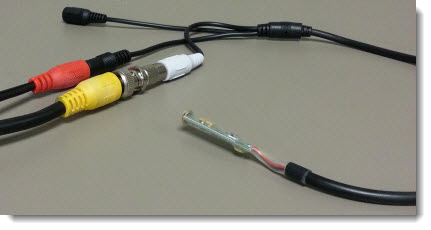
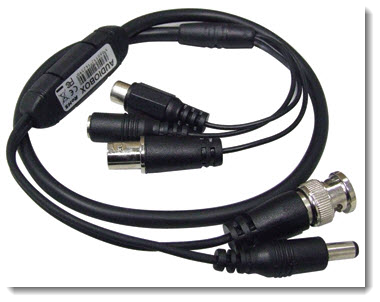
- Plug the BNC to RCA adapter into the white RCA connector on the microphone.


- Plug the BNC to RCA connector on the microphone into the yellow BNC connector on the audio cable. Line up the peg with the channel, push and twist to the right until it locks.

- Plug the RCA female end of the microphone into the male end of the audio cable.
|
If you receive an audio cable with only two connectors, the male power supply connector on the microphone is not used.
Some sites may receive a different microphone and audio cables that require all three connectors. If you receive an audio cable and camera with three connectors, ensure the male and female power cords and the BNC cable are all connected.
|

- Make sure the microphone is centrally located in the exam delivery room and is hanging down from the ceiling at least 3” – 5”.
|
What is next? |
Pearson VUE Proprietary and Confidential