Steps to capture palm vein for enrollment
|
|
This sub-section is only applicable at PVTC Selects and PVTCs equipped with a palm vein device. The palm vein device is not required at all PVTCs, but it is required at all PVTC Selects. For more information about the differences between a PVTC and PVTC Select, see About the test center network. Pearson VUE contacts test centers if they must have the equipment installed. |
Palm vein enrollment occurs when a new candidate or a returning candidate is admitted who has never had a palm vein pattern captured.
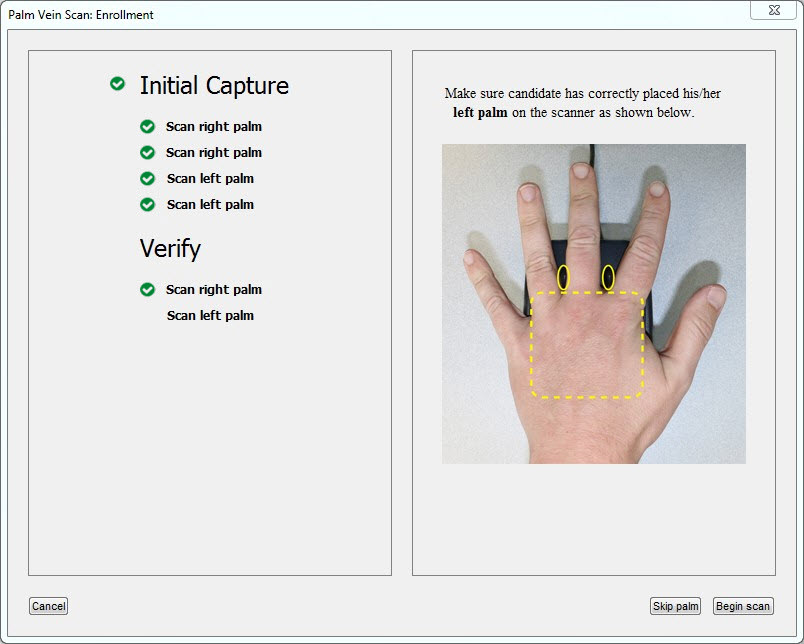
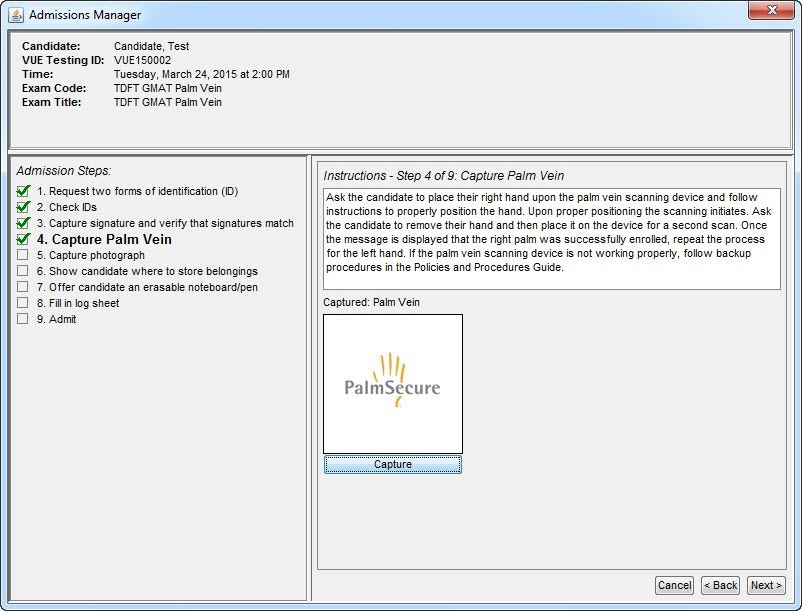
The Palm Vein Scan: Enrollment window automatically appears after you click Next in the previous admission step. If it does not, click Capture.
|
|
If the candidate's hand is missing or has any coverings that cannot be removed, such as a hard cast, large bandage, or wrap, the palm vein device cannot capture a palm vein pattern. In either event, skip the capture for that palm by clicking Skip palm. Create a case explaining why the palm vein capture was skipped for that palm. |
Follow these steps to capture the candidate's palm vein pattern:
|
|
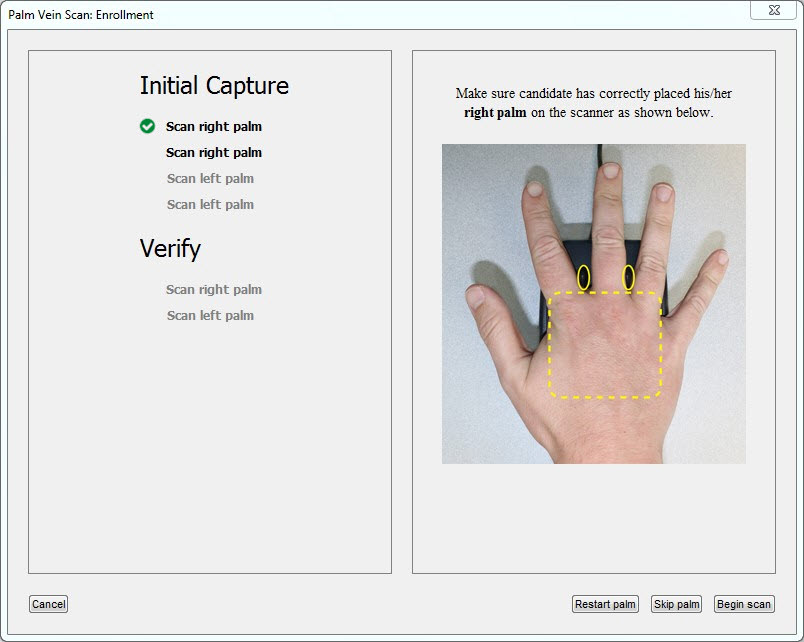
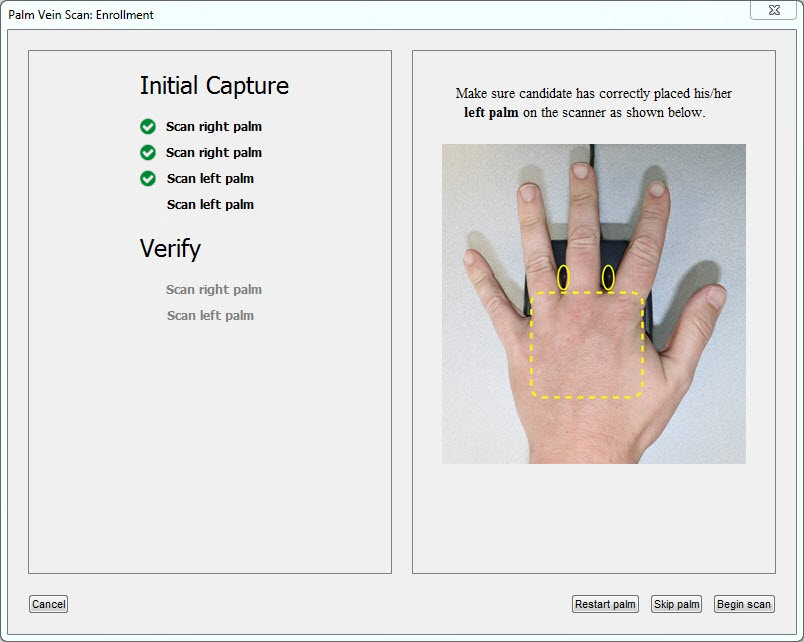
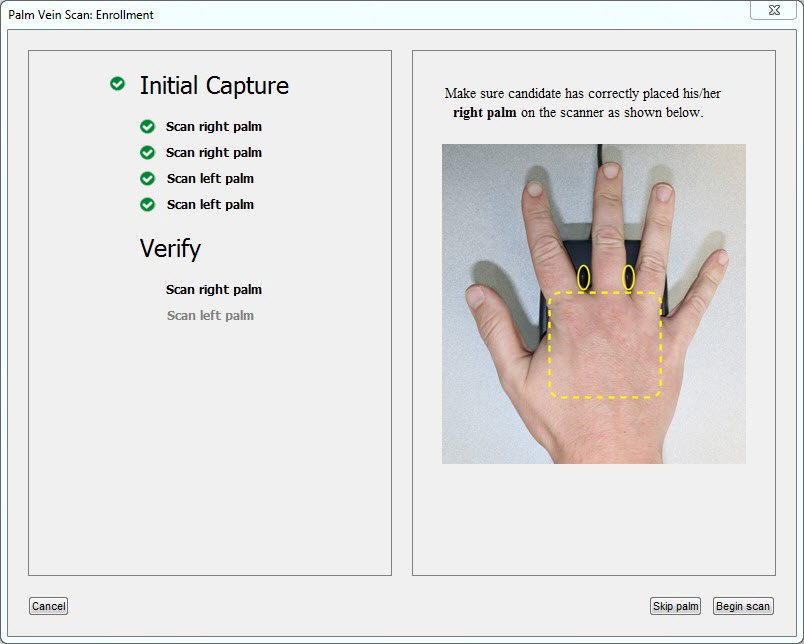
Before you click the button to scan a candidate's palm for enrollment, it is essential to have the candidate correctly position the hand on the device. If the hand is not properly positioned and the device cannot collect a high-quality scan during enrollment, it may be difficult to verify the candidate's palm later in the admissions process. See Positioning hands for palm vein capture for more information. |
-
When the Palm Vein Scan: Enrollment window appears, tell the candidate to place his or her right palm on the device, and click Begin scan.

|
|
To activate the buttons that appear in the various palm vein capture windows, follow the directions that appear on screen. If the buttons are inactive, the candidate may need to remove the hand from the device. |
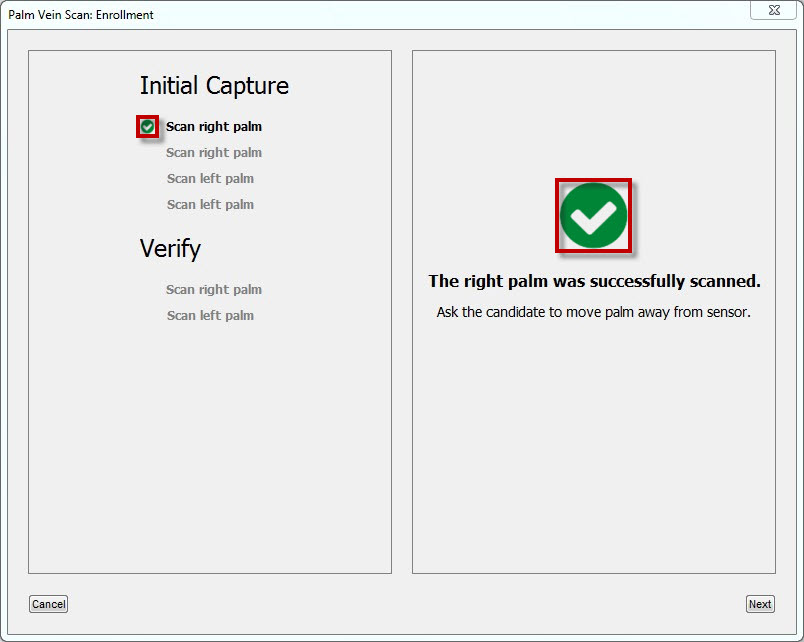
After you capture the first right palm scan, a check mark appears next to the first instance of "Scan right palm" in the left pane and above the text in the right pane of the Palm Vein Scan: Enrollment window.
-
Tell the candidate to remove the right palm from the device, and click Next. After a moment, tell the candidate to place the right palm back on the device, and click Begin scan.
-
If the sensor has difficulty recognizing the palm vein pattern after you click Begin scan, a message prompts you have the candidate remove the palm from the device, wait a moment, and then place the right palm back on the device.
-
If the sensor cannot recognize the right palm after multiple attempts, click Restart palm, and return to step 1.
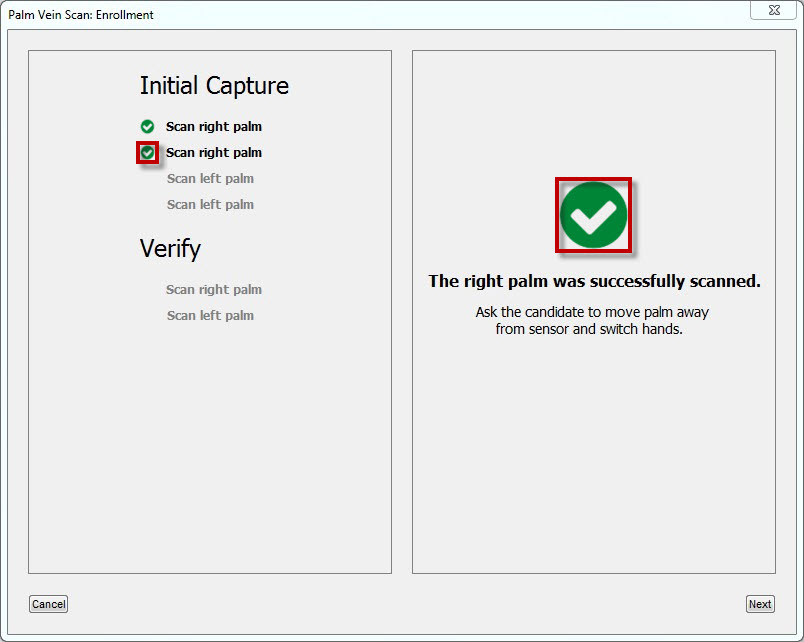
After you capture the second right palm scan, a check mark appears next to the second instance of "Scan right palm" in the left pane and above the text in the right pane of the Palm Vein Scan: Enrollment window.
-
Tell the candidate to remove the right palm from the device, and click Next. After a moment, tell the candidate to place the left palm on the device again, and click Begin scan.

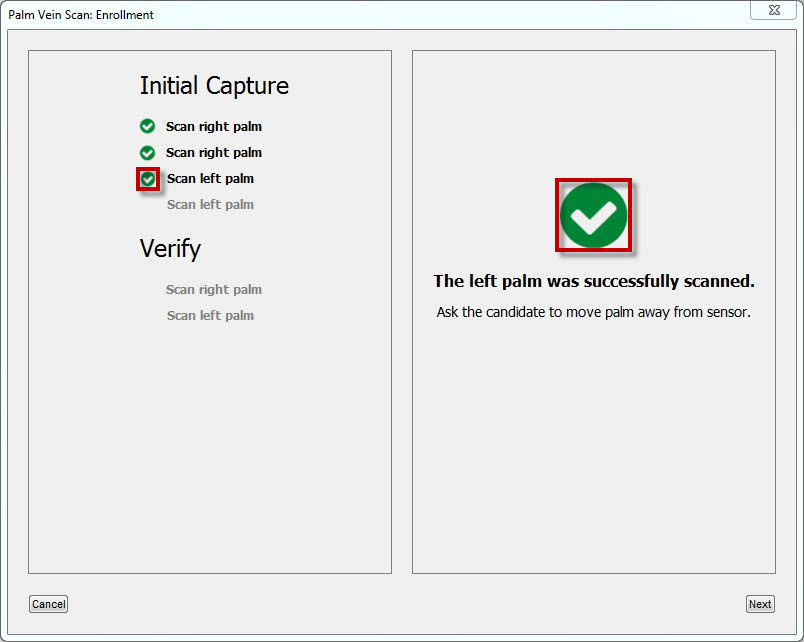
After you capture the first left palm scan, a check mark appears next to the first instance of "Scan left palm" in the left pane and above the text in the right pane of the Palm Vein Scan: Enrollment window.
-
Tell the candidate to remove the left palm from the device, and click Next. After a moment, tell the candidate to place the left palm back on the device, and click Begin scan.
-
If the sensor has difficulty recognizing the palm vein pattern after you click Begin scan, a message prompts you to have the candidate remove the palm from the device, wait a moment, and then place the left palm back on the device.
-
If the sensor cannot recognize the left palm after multiple attempts, click Restart palm, and return to step 1.
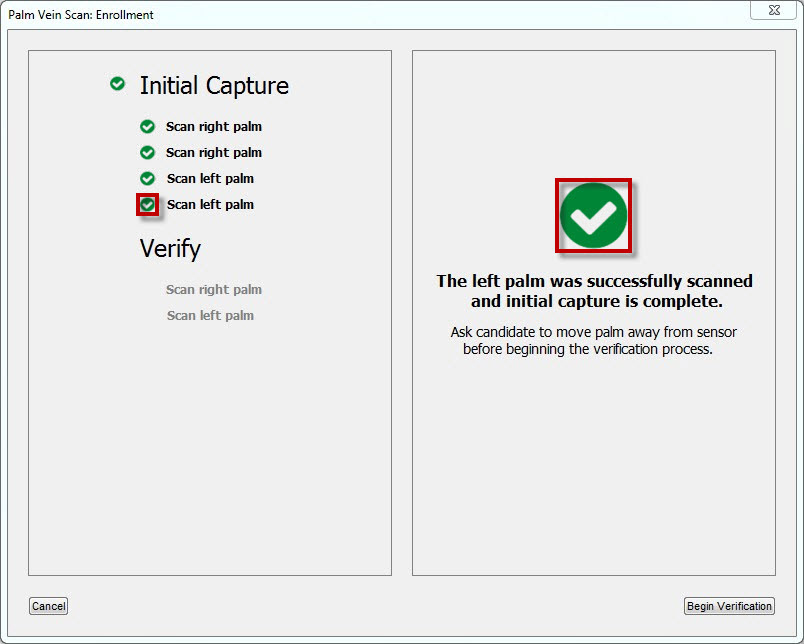
After you capture the second left palm scan, a check mark appears next to the second instance of "Scan left palm" in the left pane and above the text in the right pane of the Palm Vein Scan: Enrollment window.
-
Tell the candidate to remove the left palm from the device, and click Begin Verification. After a moment, tell the candidate to place the right hand on the device for verification, and click Begin scan.
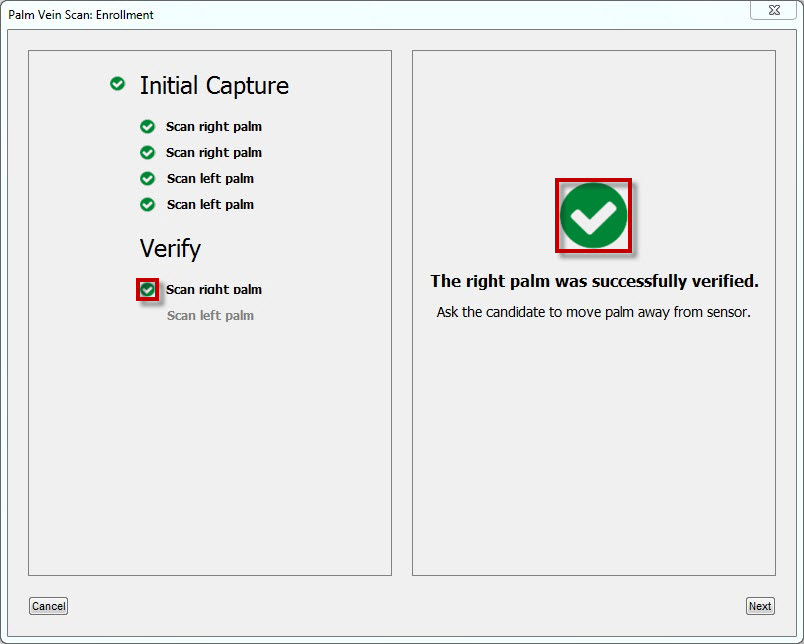
Each palm vein pattern must be verified one last time before the enrollment is complete.
After the candidate's right palm vein is verified, a check mark appears next to the third instance of "Scan right palm" in the left pane and above the text in the right pane of the Palm Vein Scan: Enrollment window.
-
Tell the candidate to remove the right palm from the device, and click Next. After a moment, tell the candidate to place the left palm on the device for verification, and click Begin scan.
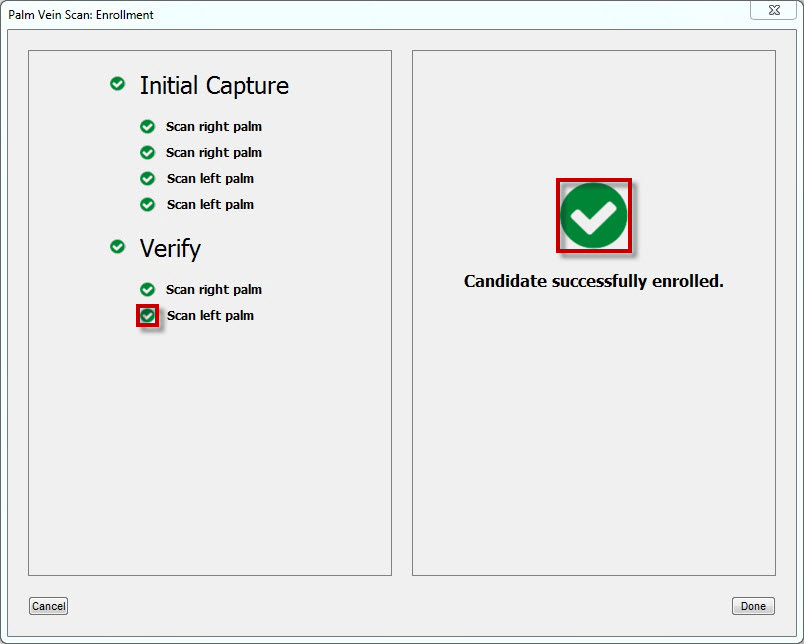
After the candidate's left palm vein is verified, a check mark appears next to the third instance of "Scan left palm" in the left pane and above the text in the right pane of the Palm Vein Scan: Enrollment window.
-
Tell the candidate to remove the left palm from the device, and click Done to end the palm vein capture process.
After you click Done, the Palm Vein Scan: Enrollment window closes, and a check mark appears next to the "Capture Palm Vein" step in the Admissions Manager window.
If necessary, click Cancel to cancel the palm vein capture process.
|
|
If a failure occurs in the Palm Vein Scan: Enrollment window and you are unable to enroll the candidate, see Failed enrollment during admission. |
-
Click Next to continue the admission process.
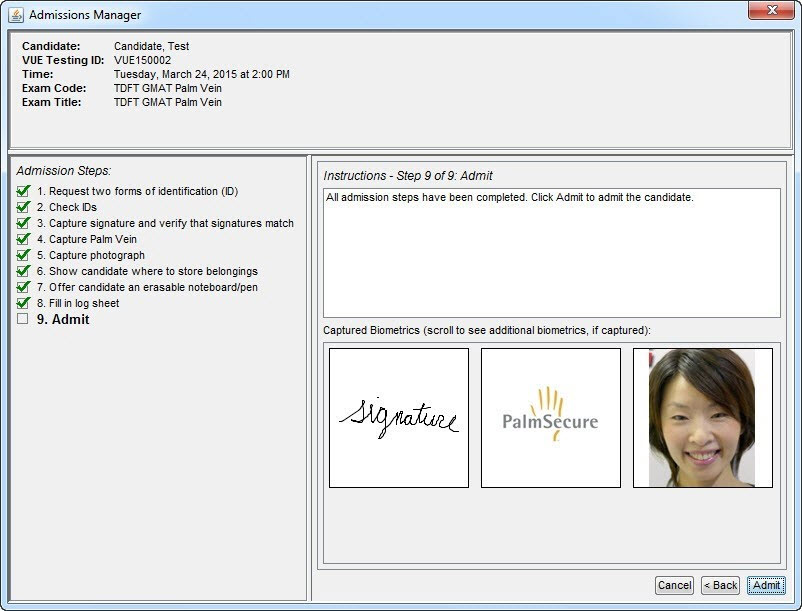
Before you admit the candidate at the end of the admission process, the PalmSecure image appears next to the candidate's photograph and signature in the Admissions Manager window.
Copyright © 2026 Pearson, Inc. or its affiliates. All rights reserved. Pearson Confidential.