Test and align the admissions camera - candidate
You will need to spend some time working with the camera to ensure the candidate placement is accurate to capture a good picture. Use the Test Admissions Equipment application to practice taking photos of candidates and objects. You may need to move the chair or adjust the camera height to ensure a good quality photo is taken. Make sure your staff takes time to practice taking photos before a candidate shows up for testing.
Capture candidate photograph
Follow these steps to verify that the camera is working properly for capturing candidate photographs:
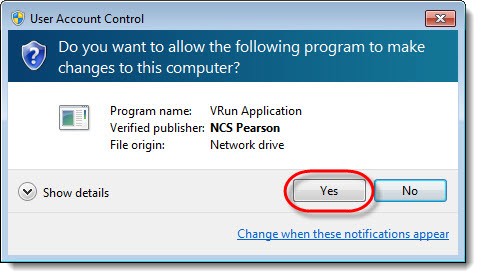
- On the Administration workstation, select the Windows Start button and select the All Apps | VUE Applications | Test Admissions Equipment menu.
- Select Yes in the User Account Control dialog box.

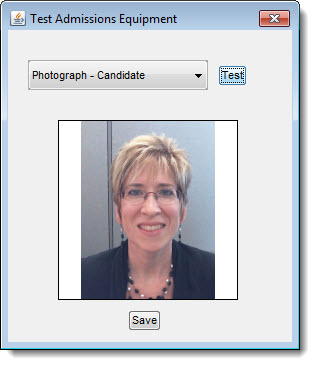
- To take a picture of a candidate, select Photograph - Candidate from the drop-down list in the Test Admissions Equipment dialog box.

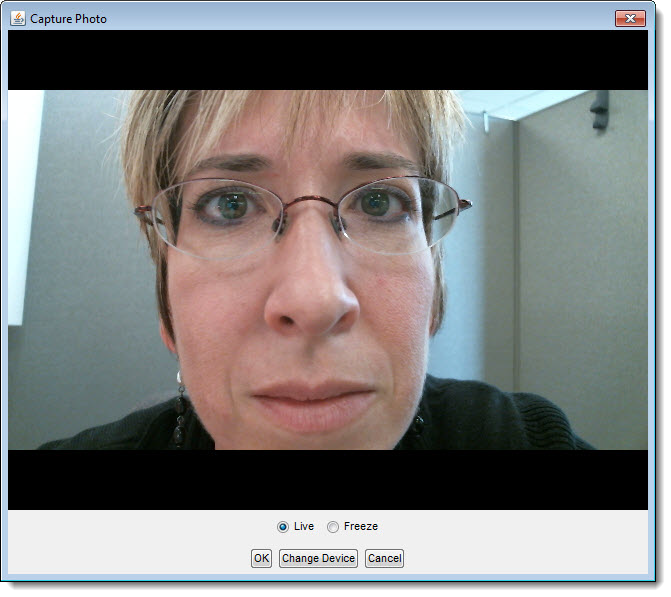
- Select the Test button to display the Capture Photo dialog box.
- The candidate’s photo appears in the Capture Photo dialog box. The dialog box displays what you are currently viewing through the camera lens. Adjust the photo so that the subject is about 24-36 inches from the camera and the photo has the head and shoulders showing against a bare neutral background.

|
Do not place the camera too far away or too close (use the 24-36 inch measure). Doing so may cause the candidate to not match up for their next testing event.
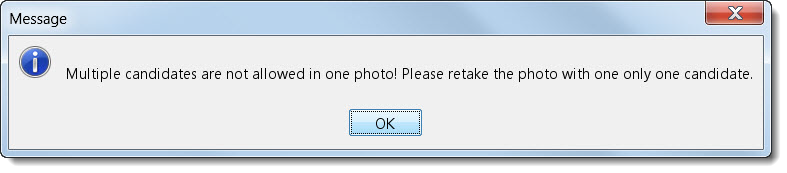
The following screen shots represent possible errors you may encounter. You may need to adjust the camera placement to properly capture a candidate photo.
|
 Note
Note


- Adjust the location and height of the camera, if necessary.
|
Only the person’s head and shoulders should display in the field of view in the Capture Photo dialog box. |
- When you are done, select the OK button to close the Capture Photo dialog box.
- The candidate image is captured and displayed in the Test Admissions Equipment dialog box. Select Save.
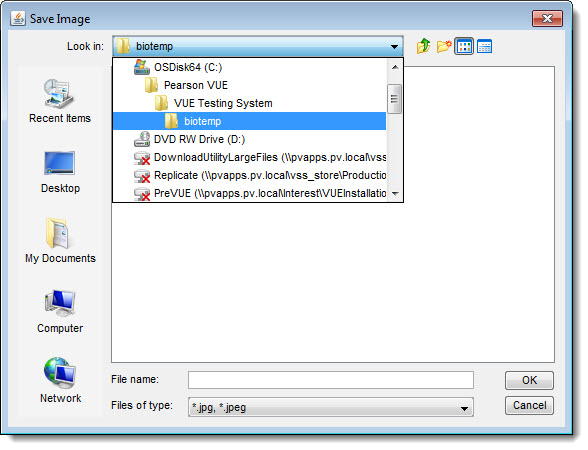
- The Save Image dialog box opens to the Pearson VUE\VUE Testing System\biotemp directory. Enter the Candidate’s first name, last name, and date so the file has a unique name. Do not include spaces in the name; use hyphens or underscores instead.
For example: John-Doe-20130814.jpg ![]()
![]()
- Select OK to close the Save Image dialog box and save the image.
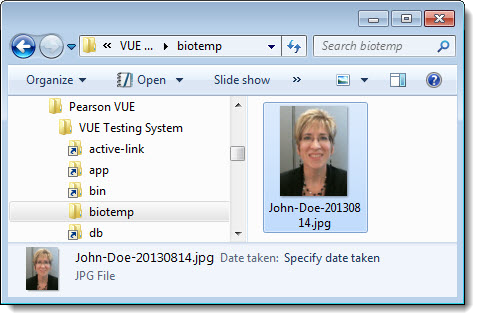
A .jpg file is saved in the %VUERoot%\biotemp directory. ![]()
![]()
- Select the Close button in the upper right corner of the Test Admissions Equipment dialog box to exit the application.
|
If you attempt to run the software using a non-Aware compliant camera, the following error message displays.
|

|
What is next? |
Pearson Proprietary and Confidential