Connect the palm vein device
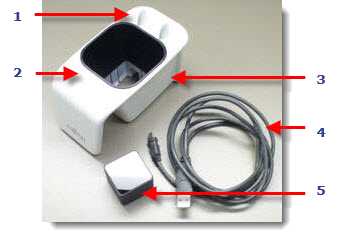
This section of the guide describes how to assemble and connect the palm vein device to the administration workstation. The picture below identifies each piece of hardware included in your kit and where to place your hand on the device.
|
EQUIPMENT |
NOTES |
|---|---|
|
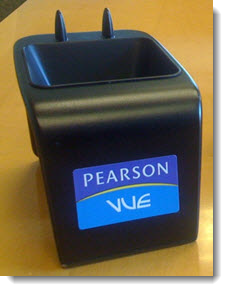
Palm Vein Device |
|
- Plug the USB cord into the palm vein sensor.


- There is a hole in the cradle and the palm vein sensor that you must line up when you place the sensor into the cradle.
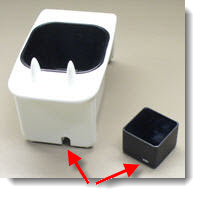
Hole for USB cord
- Flip the cradle upside down and insert the palm vein sensor into the hole. Make sure the USB cord lines up with the opening.
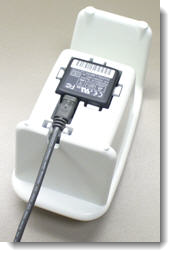
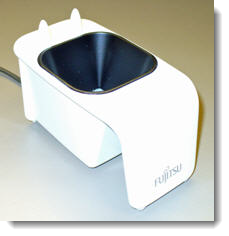
- Flip the cradle right side up and place it on the administration workstation table.
- The palm vein sensor could become dirty during the shipping process. This could affect the performance of the device. You should clean the sensor prior to testing the device. You only need to clean the top of the sensor which is located inside the hand guide. The glass portion should be cleaned with a soft and non-abrasive cloth and a few drops of a glass cleaner or computer screen cleaner. Please do not use any harsh chemicals. The liquid cleaner should be applied to the glass portion of the sensor and then removed with the soft cloth.
- Plug the USB end of the cord into a port on the USB hub or into a USB port on the administration workstation. See Recommended USB configuration without USB hub topic for details.
- Place the Pearson VUE sticker on the side of the cradle that faces the candidate as they check-in.
Your palm vein device is now ready to test.
Make sure the palm vein device is placed on the administrator’s desk with the USB cord facing away from the candidate.
|
What is next? |
Pearson Proprietary and Confidential