Checking palm vein in Entry Monitoring
If the exam sponsor requires you to verify a candidate's palm vein pattern, the Palm Vein Scan: Entry Monitor – Sign In/Sign Out window appears after you click Check Palm Vein in Entry Monitoring.
Follow these steps to verify the candidate's palm vein pattern during entry monitoring:
-
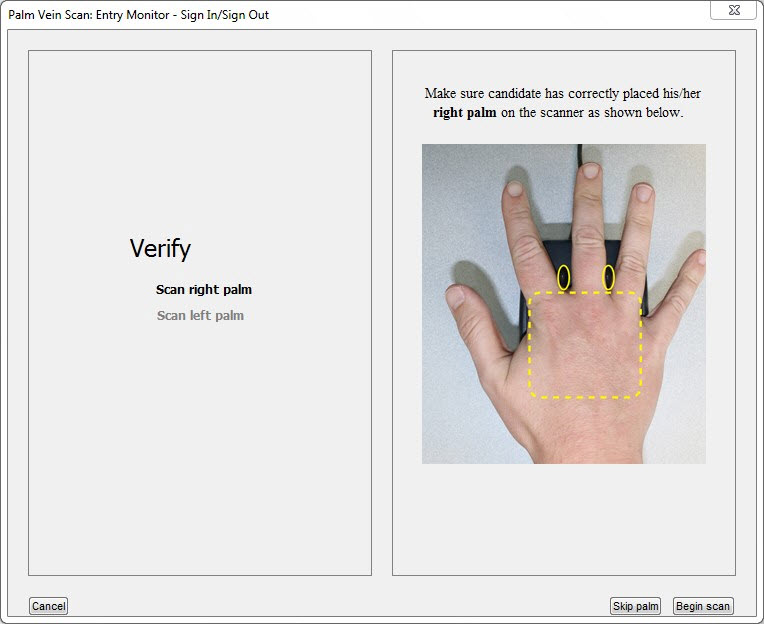
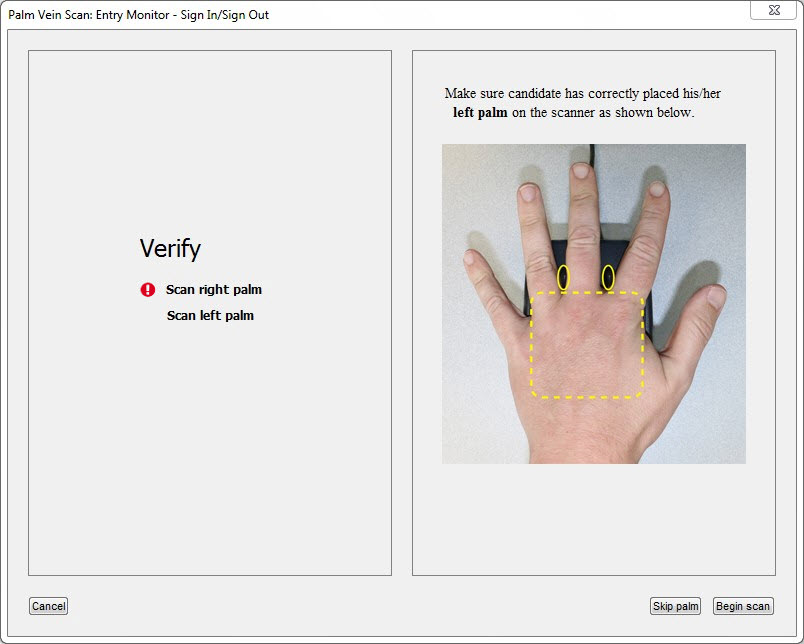
When the Palm Vein Scan: Entry Monitor – Sign In/Sign Out window appears, tell the candidate to place his or her right palm on the device, and click Begin scan.
|
|
To activate the buttons that appear in the various palm vein capture windows, follow the directions that appear on screen. If the buttons are inactive, the candidate may need to remove the hand from the device. |
The software verifies whether the right palm on the device matches the palm vein pattern stored in the system for the candidate. There are four possible outcomes from the verification. See the following table for instructions on how to proceed for each outcome:
|
Outcome |
Instructions |
|
Right palm vein matches |
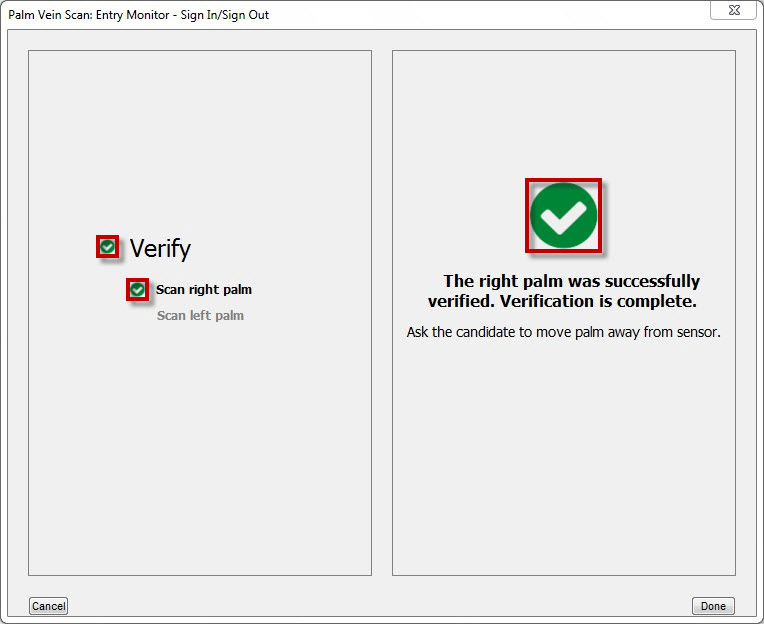
If the right palm vein pattern is recognized, a check mark appears next to both "Verify" and "Scan right palm" in the left pane and above the text in the right pane.
Tell the candidate to remove the right palm from the device, and click Done. Continue to step 3. (Skip step 2.) |
|
Right palm vein incorrectly scanned |
If the right palm vein pattern is scanned incorrectly, "The right palm was not correctly scanned" appears in the right pane. Tell the candidate to remove the right palm from the device, and click Rescan. After you click Rescan, repeat the process in step 1. |
|
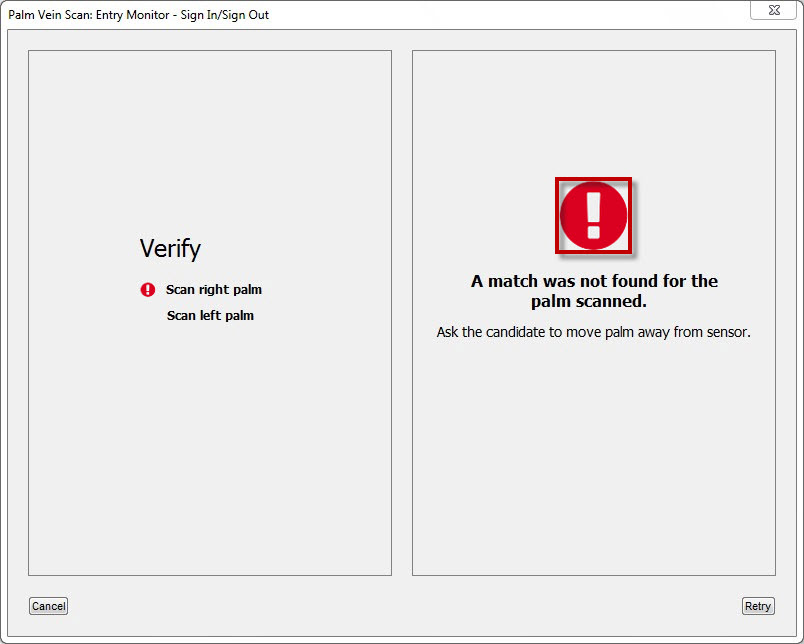
Right palm vein does not match on first attempt |
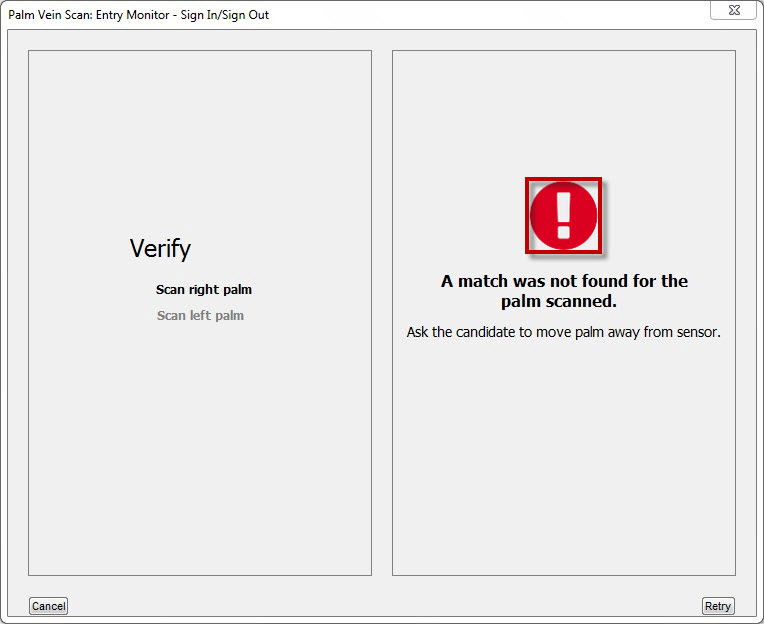
If the right palm vein pattern is not recognized, an exclamation point appears above the text in the right pane.
Tell the candidate to remove the right palm from the device and click Retry. After you click Retry, repeat the process in step 1. |
|
Right palm vein does not match on second attempt |
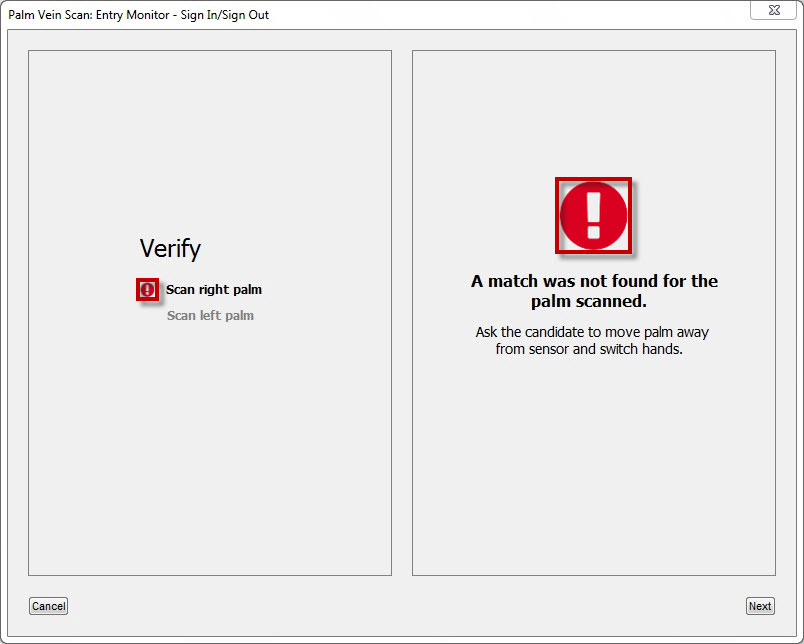
If the right palm is not recognized after a second attempt, an exclamation point appears next to "Scan right palm" in the left pane and above the text in the right pane.
Tell the candidate to remove the right palm from the device and click Next. You must now attempt to verify the candidate's left palm. Continue with step 2 in this process. |
-
Tell the candidate to place the left palm on the device, and click Begin scan.
The software verifies whether the left palm on the device matches the left palm vein pattern stored in the system for the candidate. There are five possible outcomes from the verification. See the following table for instructions on how to proceed for each outcome:
|
Outcome |
Instructions |
|
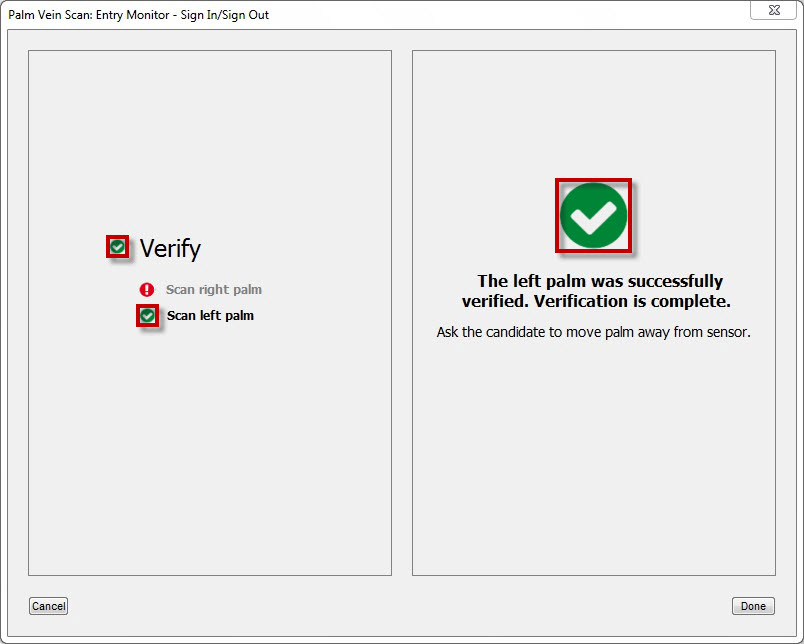
Left palm vein matches |
If the left palm vein pattern is recognized, a check mark appears next to both "Verify" and "Scan left palm" in the left pane and above the text in the right pane.
Tell the candidate to remove the left palm from the device, and click Done. Continue to step 3. |
|
Left palm vein incorrectly scanned |
If the left palm vein pattern is scanned incorrectly, "The left palm was not correctly scanned" appears in the right pane. Tell the candidate to remove the left palm from the device, and click Rescan. After you click Rescan, repeat the process in step 2. |
|
Left palm vein does not match on first attempt |
If the left palm vein pattern is not recognized, an exclamation point appears above the text in the right pane.
Tell the candidate to remove the left palm from the device and click Retry. After you click Retry, repeat the process in step 2. |
|
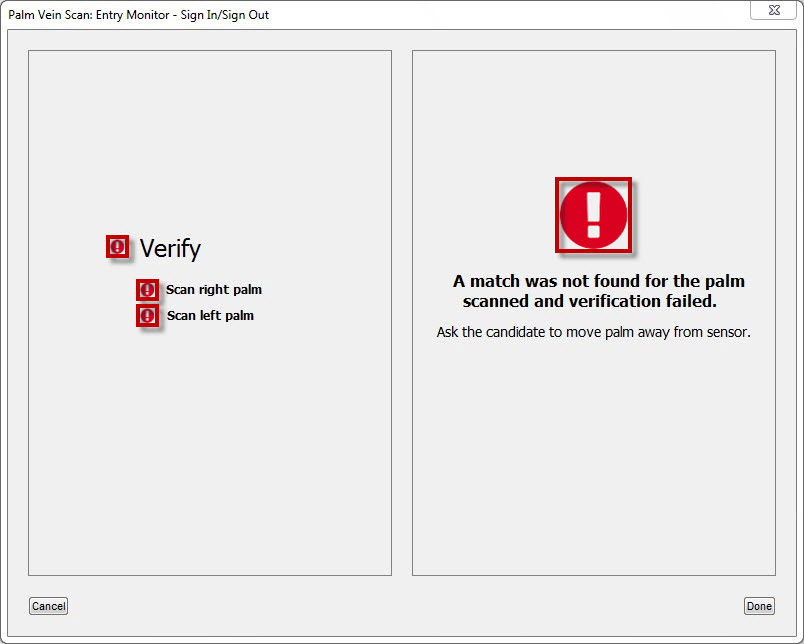
Left palm vein does not match on second attempt |
If the palm vein pattern is not recognized after a second attempt, an exclamation point appears next to "Verify," "Scan right palm," and "Scan left palm" in the left pane and above the text in the right pane.
Tell the candidate to remove the left palm from the device and click Done. You now must retry the entire palm vein verification process starting with step 1. |
|
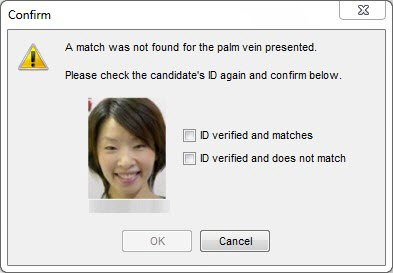
Definite no match found for both palms |
If the following message appears on the screen, ask the candidate for his or her primary ID. Recheck the candidate's primary ID, and compare it to the photo on the screen.
|
|
|
If necessary, you can stop the palm vein verification process by clicking Cancel. This will return you to the Entry Monitoring pane, and the candidate will not be signed in or out. |
-
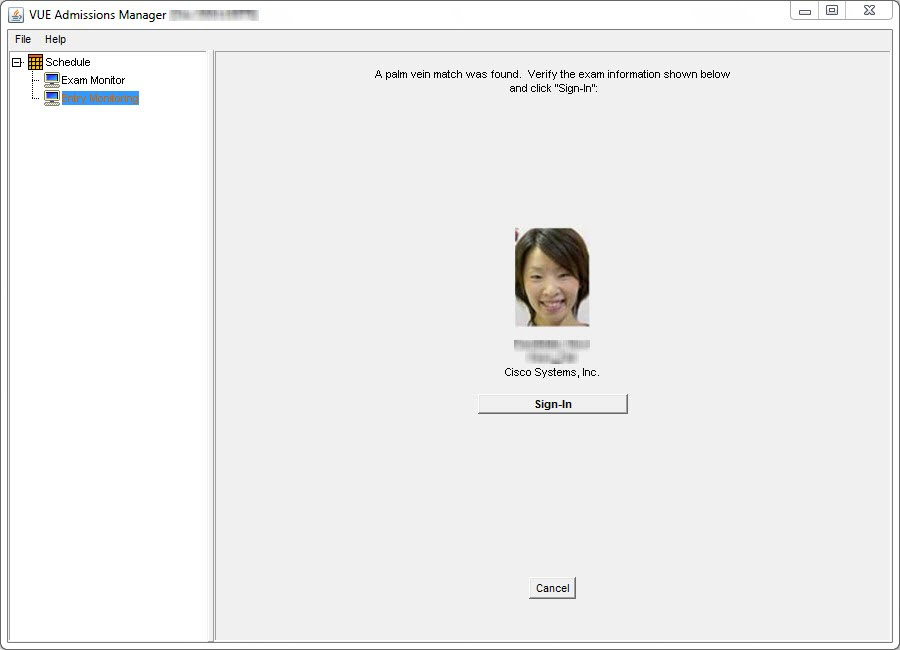
When the following screen appears in Entry Monitoring after a successful verification of the candidate's palm vein, verify the candidate's name and confirm that the exam listed is the one the candidate is currently taking.
-
Click Sign-In or Sign-Out if the candidate's information is correct, or click Cancel if the information is incorrect.
If you click Cancel, a message warns you that the candidate has not been signed in or out. After you close the message, the candidate list appears. Verify that the correct candidate is selected and that the candidate was admitted correctly. If the candidate was admitted incorrectly or there is a different problem, contact VSS.
Copyright © 2026 Pearson, Inc. or its affiliates. All rights reserved. Pearson Confidential.