Checking headphones
Each exam delivery workstation is equipped with headphones in case candidates need to listen to exam items that contain audio. Some headphones also include a microphone for voice recording. At the start of each day, test the headphones at the exam delivery workstations to make sure that they are working properly. Also check the schedule in advance to see whether any upcoming exams require a specific headphone model. Completing these tasks at the start of each day helps you to resolve issues in advance so that there are fewer disruptions when candidates are testing.
When you check the headphones, complete the following tasks:
-
Check the day's schedule and determine whether any exams require a specific headphone model.
After you look at the schedule, check the exam sponsor's client reference to determine whether a specific headphone model is required for an exam. To help you determine which headphones to provide, refer to the Headphone Models Chart, which is available in the Resources application in the Connect portal. This chart provides an overview of the different headphone models that are used at company-owned sites and lists which exam sponsors require a specific headphone for exams. It also contains information on how to adjust the volume either on the workstation or on the headphone.
After you have determined which exams require a specific model, place the headphones at the proctor workstation so that you will be ready to provide the headphones when you are seating the candidate. If you will not be proctoring the exams, leave a note at the proctor workstation to inform the test administrator who will be proctoring about the exams that require the specific headphones.
-
Test the headphones at each exam delivery workstation to ensure that they are working properly.
Follow these steps to test the headphones:
-
Put on the headphones. On the workstation, click Start on the Windows taskbar, point to Control Panel, and click Sound.
The Sound window appears.
-
On the Playback tab, click Speakers, and then click Properties.
The Speakers Properties window appears.
-
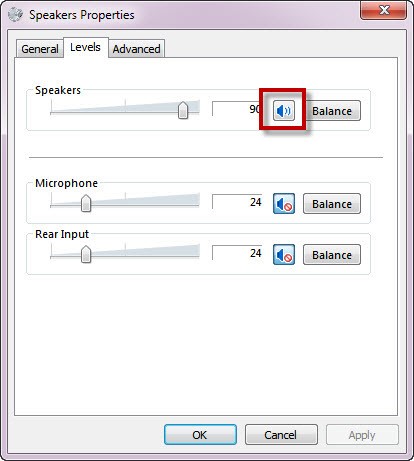
On the Levels tab, make sure that the Mute icon is not displayed. If it is, click the icon so that the unmuted speaker shown in the following image appears. Click OK.
-
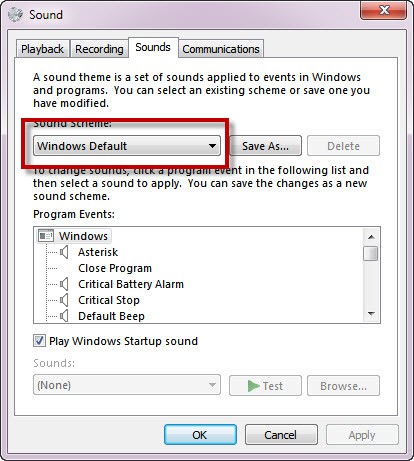
Next, click the Sounds tab and select Windows Default in the Sound Scheme drop-down menu, if it is not already selected.
-
Select Asterisk in the Program Events list.
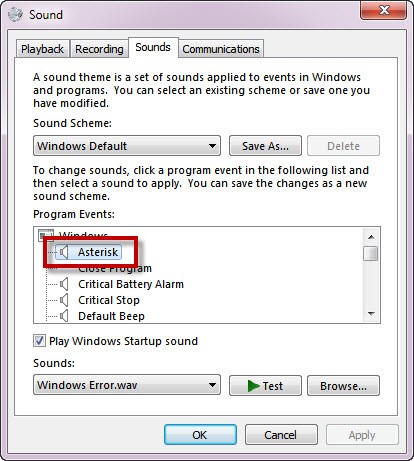
In the Sounds drop-down menu, Windows Error.wav should automatically be selected, as shown above. If it is not, select it in the menu.
-
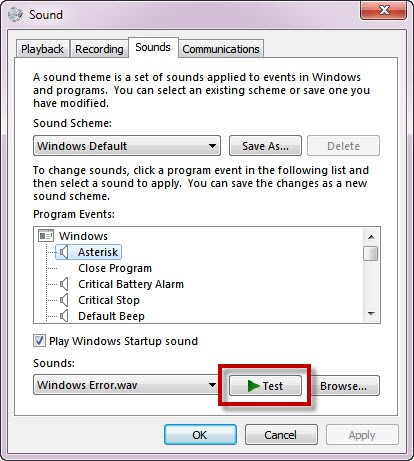
Click Test next to the Sounds drop-down menu to test the volume.
You should hear a sound when you click Test.
-
When you are finished, click OK to close the window.
Copyright © 2025 Pearson Education, Inc. or its affiliate(s). All rights reserved. Pearson VUE Confidential. pvuecopyright@pearson.com